
Transformers documentation
Keypoint 매칭
Keypoint 매칭
Keypoint matching은 두 개의 서로 다른 이미지에 등장하는 동일한 객체에 속하는 서로 다른 관심 지점들을 매칭하는 작업입니다. 대부분의 최신 keypoint matcher는 이미지를 입력으로 받아 다음을 출력합니다.
- Keypoint 좌표 (x,y): 두 개의 리스트를 사용하여 첫 번째 이미지와 두 번째 이미지 간의 픽셀 좌표를 1:1로 매핑합니다. 첫 번째 리스트의 특정 인덱스에 있는 keypoint는 두 번째 리스트의 동일한 인덱스에 있는 keypoint와 매칭됩니다.
- 매칭 점수: 키포인트 매칭에 할당된 점수입니다.
이 튜토리얼에서는 MatchAnything framework로 학습된 EfficientLoFTR 모델로 keypoint 매치를 추출하고, 매치를 정제하는 방법을 배웁니다. 이 모델은 파라미터가 16M에 불과하여 CPU에서도 실행할 수 있습니다. AutoModelForKeypointMatching 클래스를 사용합니다.
from transformers import AutoImageProcessor, AutoModelForKeypointMatching
import torch

processor = AutoImageProcessor.from_pretrained("zju-community/matchanything_eloftr")
model = AutoModelForKeypointMatching.from_pretrained("zju-community/matchanything_eloftr")
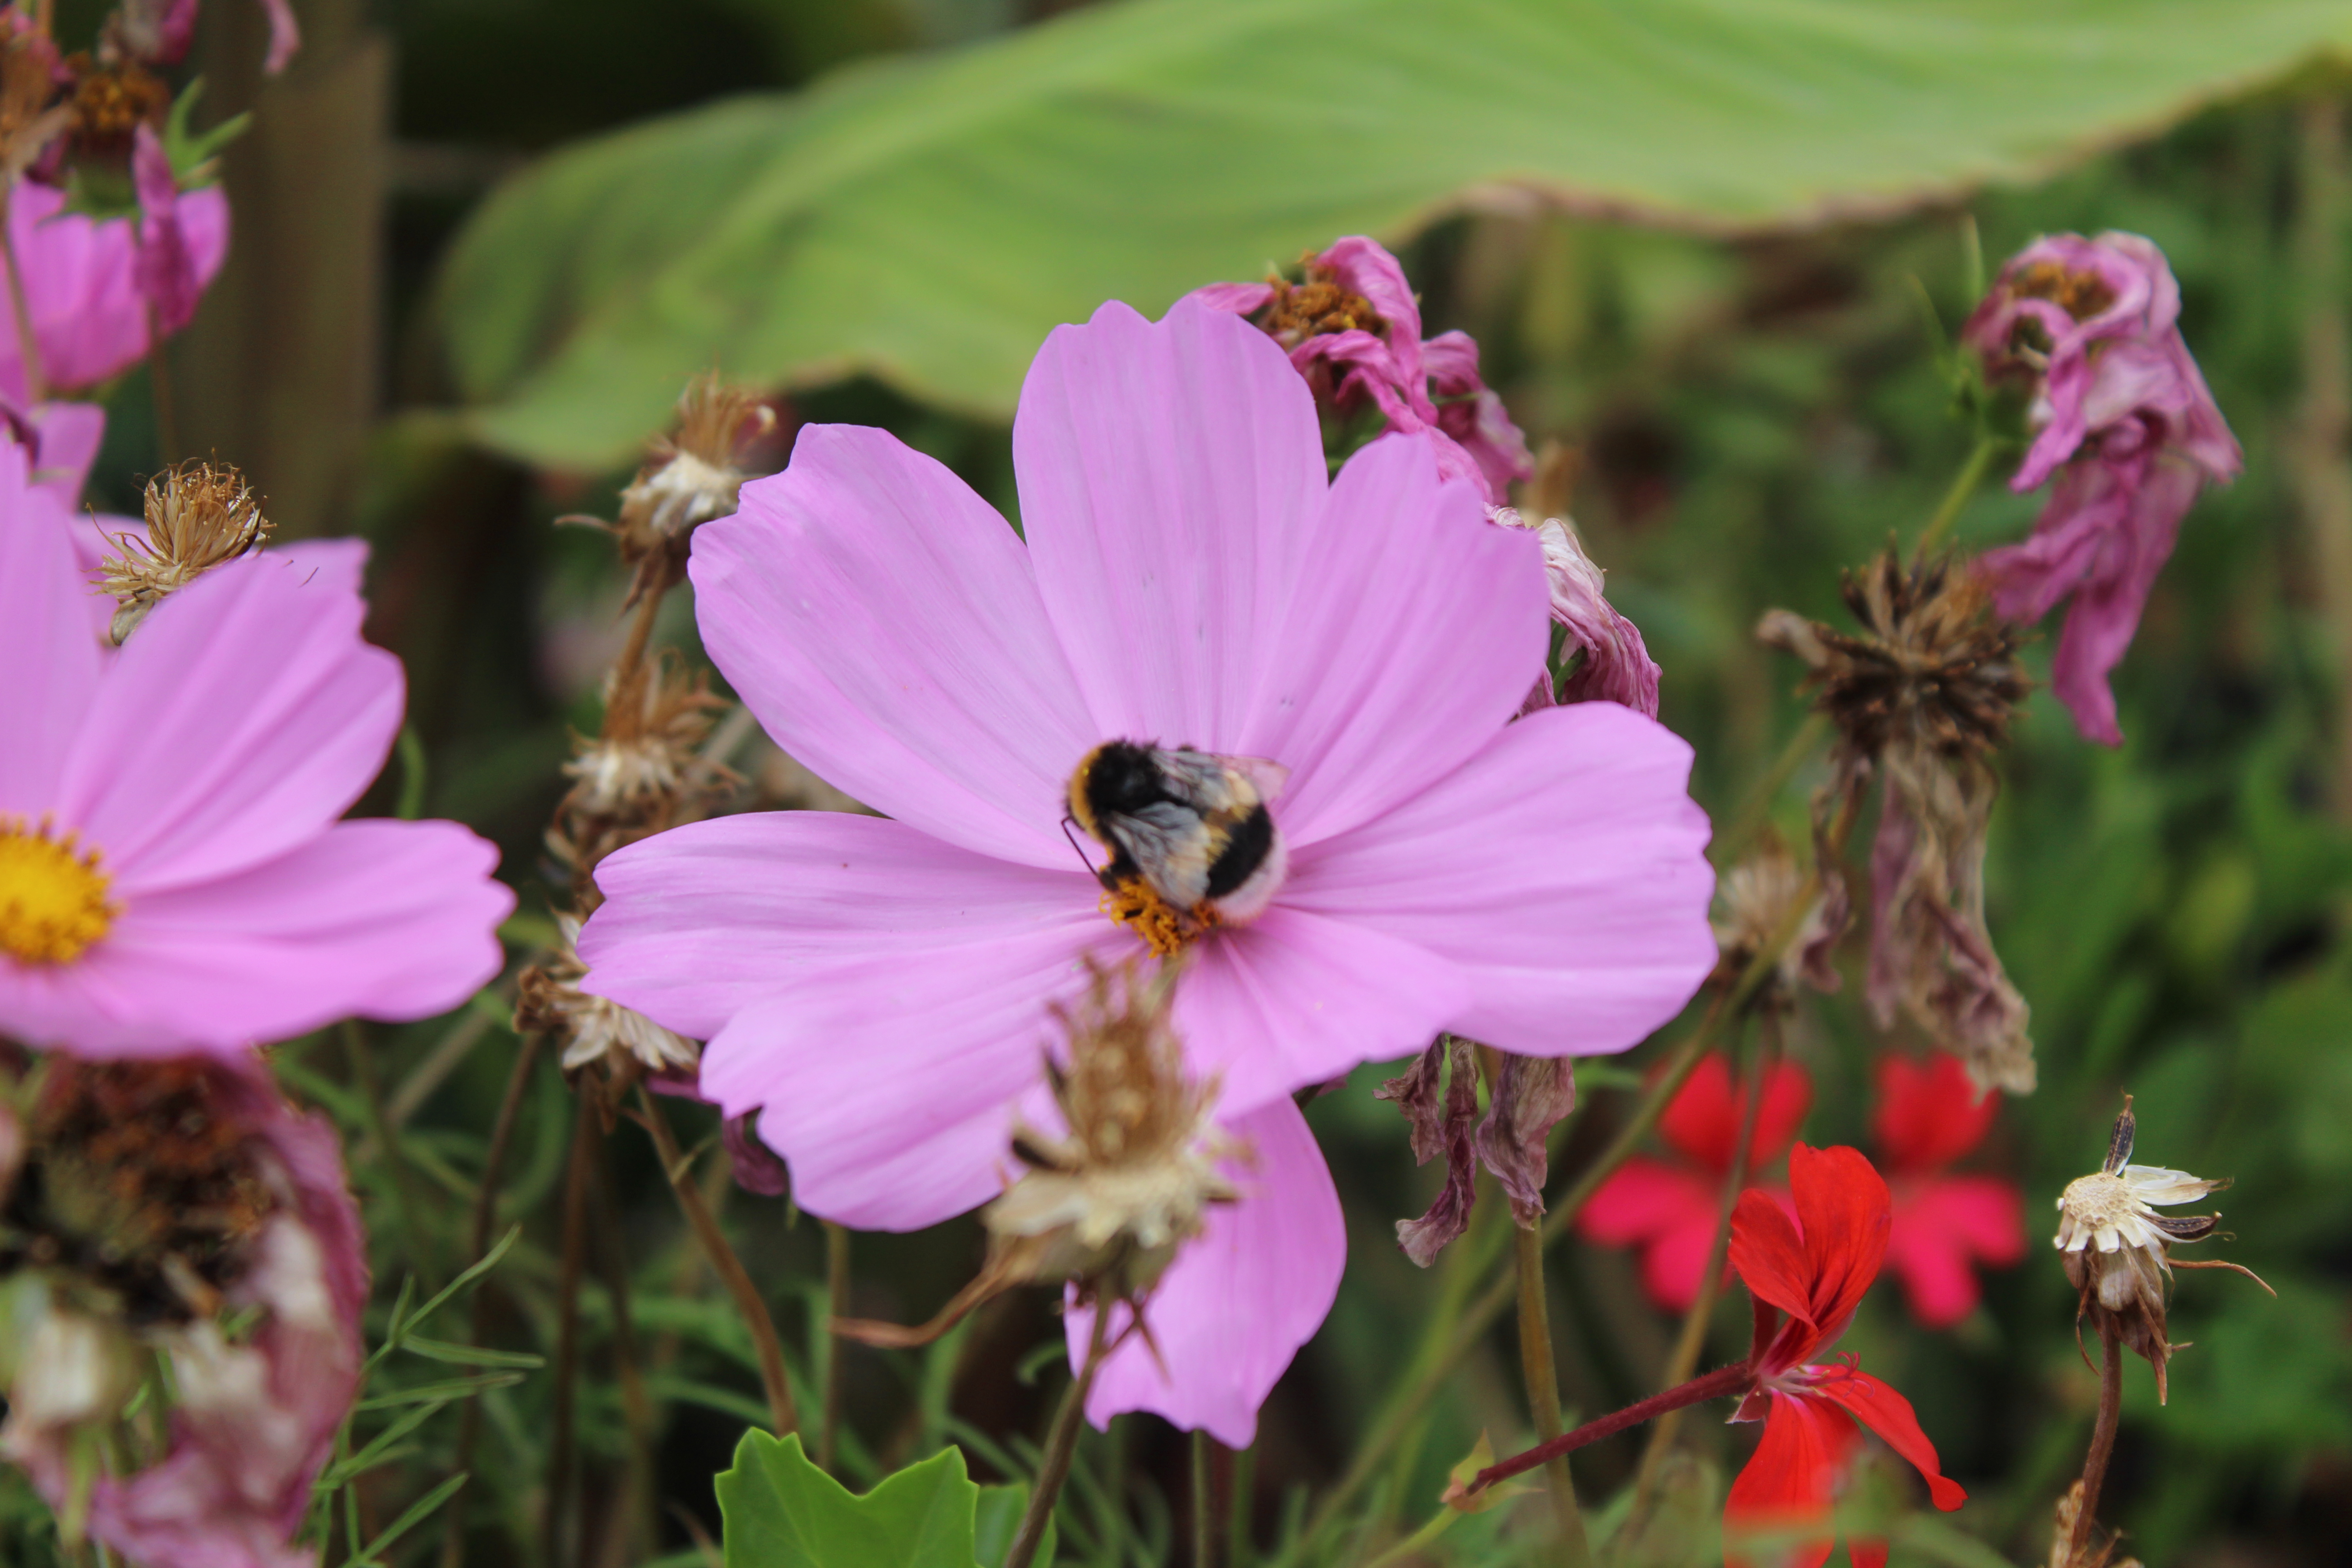
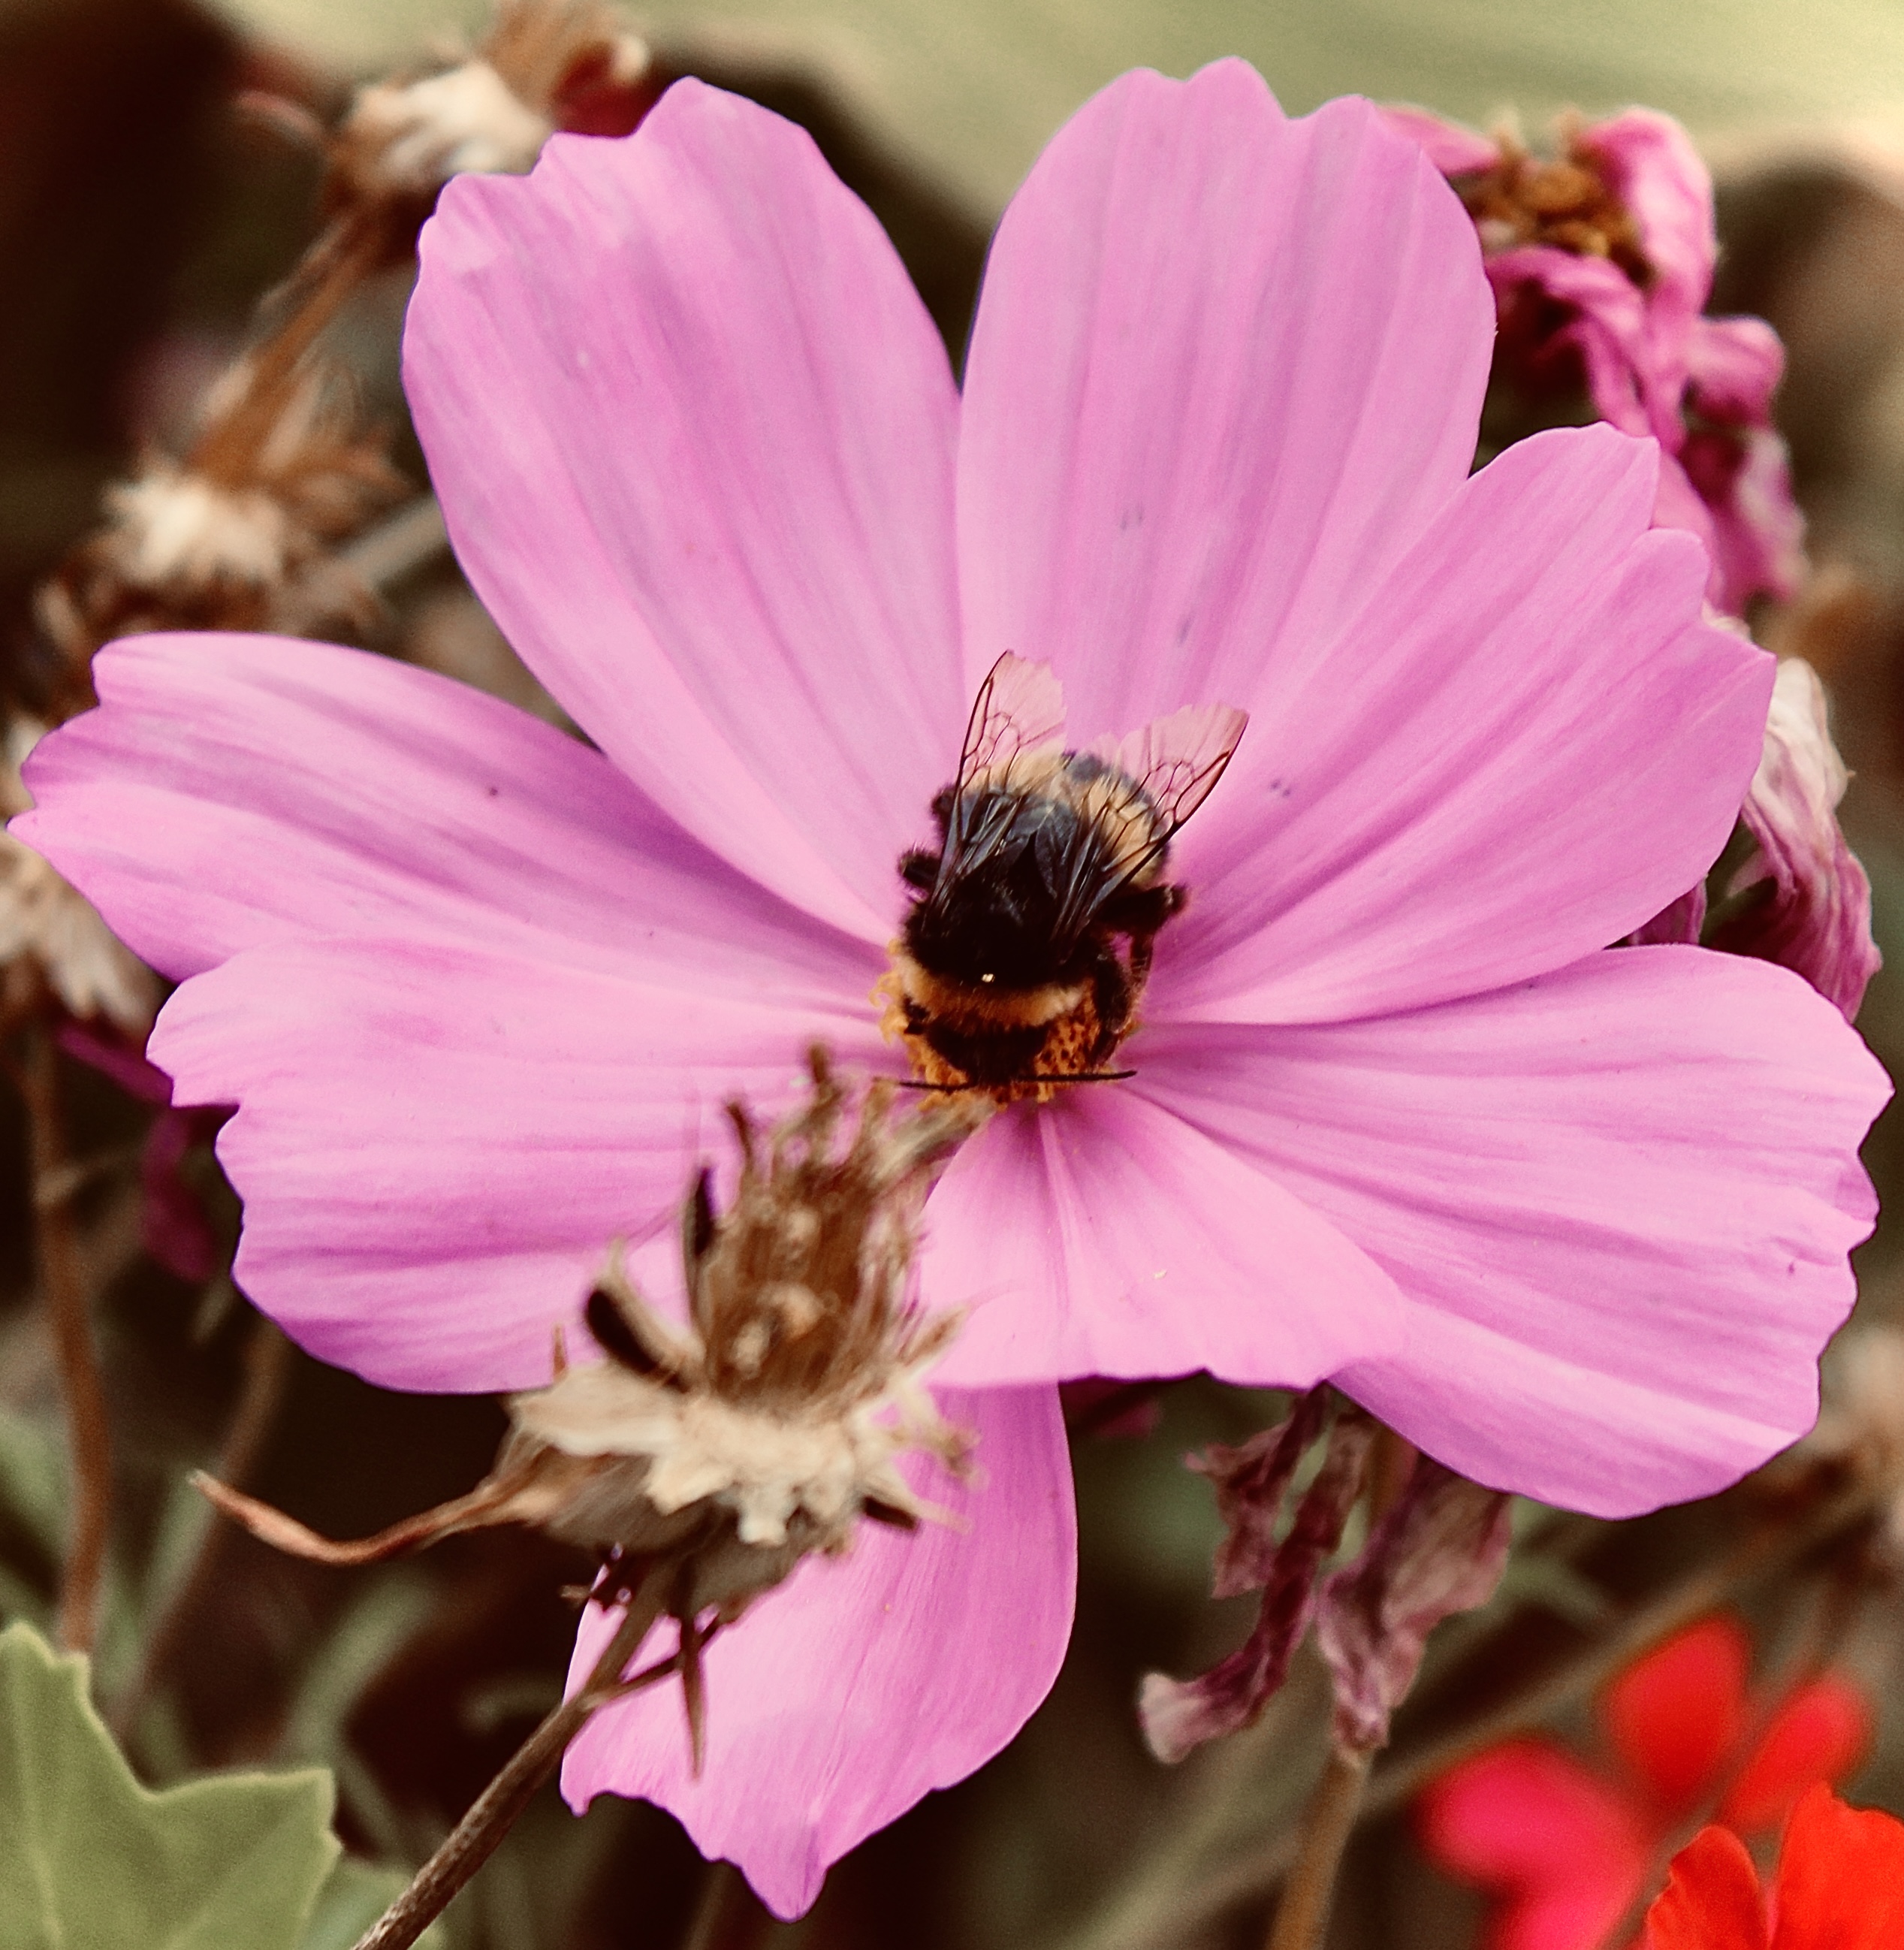
관심 대상이 동일한 두 이미지를 로드합니다. 두 번째 사진은 1초 간격으로 촬영되었으며, 색상이 편집되고 더 잘려서 회전된 상태입니다.
from transformers.image_utils import load_image
image1 = load_image("https://huggingface.co/datasets/huggingface/documentation-images/resolve/main/bee.jpg")
image2 = load_image("https://huggingface.co/datasets/huggingface/documentation-images/resolve/main/bee_edited.jpg")

images = [image1, image2]
이미지를 프로세서에 전달하여 추론을 수행할 수 있습니다.
inputs = processor(images, return_tensors="pt")
with torch.no_grad():
    outputs = model(**inputs)
출력을 후처리할 수 있습니다. threshold 매개변수는 출력 매칭에서 노이즈(낮은 신뢰도 임계값)를 정제하는 데 사용됩니다.
image_sizes = [[(image.height, image.width) for image in images]]

outputs = processor.post_process_keypoint_matching(outputs, image_sizes, threshold=0.2)
print(outputs)
여기가 출력입니다.
[{'keypoints0': tensor([[4514,  550],
          [4813,  683],
          [1972, 1547],
          ...
          [3916, 3408]], dtype=torch.int32),
  'keypoints1': tensor([[2280,  463],
          [2378,  613],
          [2231,  887],
          ...
          [1521, 2560]], dtype=torch.int32),
  'matching_scores': tensor([0.2189, 0.2073, 0.2414, ...
    ])}]
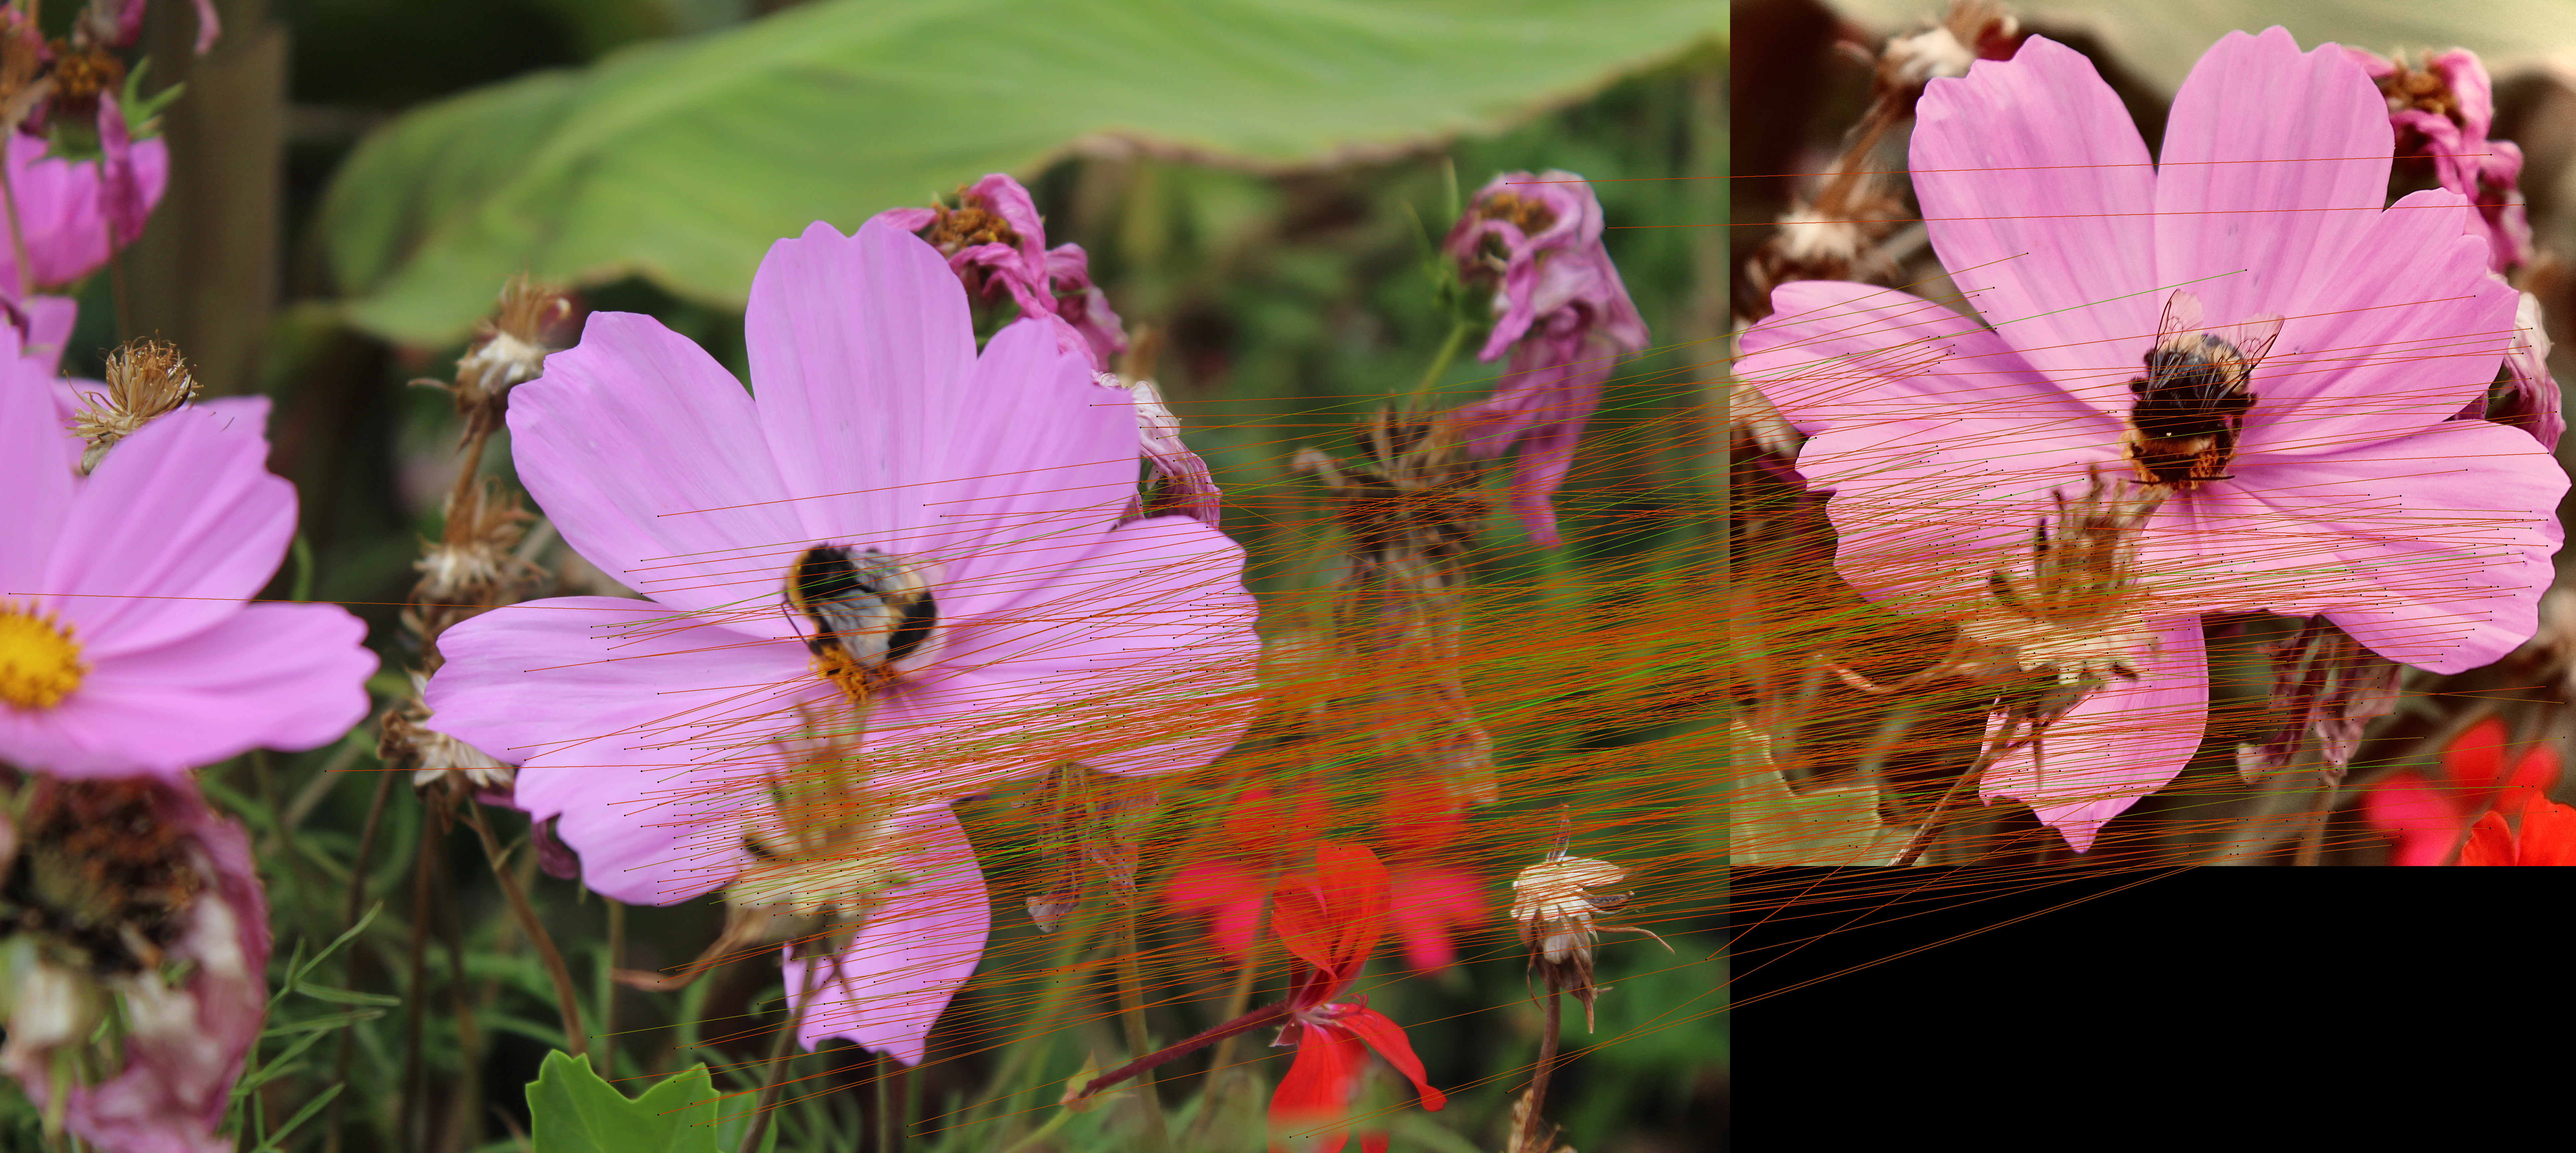
출력을 줄였지만 401개의 매칭이 있습니다!
len(outputs[0]["keypoints0"])
# 401
프로세서의 visualize_keypoint_matching() 메서드를 사용하여 이를 시각화할 수 있습니다.
plot_images = processor.visualize_keypoint_matching(images, outputs)
plot_images
선택적으로 Pipeline API를 사용하고 작업을 keypoint-matching으로 설정할 수 있습니다.
from transformers import pipeline

image_1 = "https://huggingface.co/datasets/huggingface/documentation-images/resolve/main/bee.jpg"
image_2 = "https://huggingface.co/datasets/huggingface/documentation-images/resolve/main/bee_edited.jpg"

pipe = pipeline("keypoint-matching", model="zju-community/matchanything_eloftr")
pipe([image_1, image_2])
출력은 다음과 같습니다.
[{'keypoint_image_0': {'x': 2444, 'y': 2869},
  'keypoint_image_1': {'x': 837, 'y': 1500},
  'score': 0.9756593704223633},
 {'keypoint_image_0': {'x': 1248, 'y': 2819},
  'keypoint_image_1': {'x': 862, 'y': 866},
  'score': 0.9735618829727173},
 {'keypoint_image_0': {'x': 1547, 'y': 3317},
  'keypoint_image_1': {'x': 1436, 'y': 1500},
  ...
 }
]